


Bubble Chandelier DIY

 At long last we are excited to share the process of how we created the Champagne Bubbles "Frou Frou Chandelier" for our boutique (aka Bubble Chandelier for those of you who want a simpler name for it)!
Instead of paying $3,000-$7,000 for a chandelier, we thought it would be much more rewarding to create our own for just a few hundred dollars.
This is a step-by-step guide for how we made the chandelier you see at Faire Frou Frou. Our chandelier measures 2'x4' which we needed to make large enough to make a statement in our boutique. Of course you can create any size or shape that you wish.
Supplies:
- 2'x4' white wire grid panel (though you can do any shape or size) (about $15-$23)
- CB2 Bubble Balls (50 small & 40 large) ($1.95 ea small, $3.95 ea large)
- Silver Christmas ball ornaments (80 small, 80 medium)
- Fishing line (we bought high knot strength /30 lb.) $3
- One spool of sterling silver wire (20-22 gauge). You can also do 22 gauge floral wire.
- 4 ceiling mounting hooks
- white chain (about 10 feet, cut evenly into 4 pieces)
- 4 S-hooks
- 2 lamp cord kits from Urban Outfitters (white) $12 ea
- 2 half mirror light bulbs $9 ea
 Tools you will need:
- a 2" nail
- Pliers
- one pair of wire cutters (or use scissors if you must)
- Scissors
 See the little silver toggles on the table? We tied fishing line into a knot around the toggle and slipped it into the opening on top of the CB2 ball...the other end of the fishing line was tied to the wire grid.
 Fastening the fishing line to the wire grid.
 We suspended the wire grid from the ceiling, and started tying our fishing line to it from there. We made sure to place the wire grid under an existing ceiling electrical fixture so we could easily install the lighting. We also made sure that we had enough chain length to raise and lower the grid as needed.
 Seeing the first 'bubble' hanging was so much fun
 A view from above the wire grid. We later went back and trimmed the excess fishing line.
 the first 60 glass balls have been hung...now onto the silver ball ornaments. (the light you see in the background is from another chandelier). Right around this step we added the 2 light fixtures.
 we hung the small silver ornaments right up against the wire grid so as to hide it
 Ultimately, the entire top of the chandelier should be covered with silver balls so as to fully conceal the wire grid. We actually placed some silver balls on top of the grid so as to hide it as best we could.
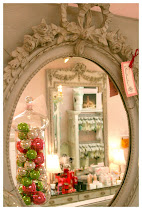
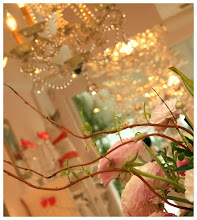
 the finished product!
 If you look closely (above) you can see the silver balls lining the top of the chandelier along the wire grid. You can also see the pink box cover that extends from the ceiling down to the chandelier itself (this picture was taken in the reflection of a large mirror).
Step 1: Insert your 4 chandelier hooks into the ceiling and attach about 2-3 feet of your white chain to each (make sure it is secured in the ceiling so as to carry the weight of the chandelier!). You need that extra amount of chain so that you can bring down the wire grid low enough to work on and install the lighting fixtures (and then raise up to the ceiling when you are done). Suspend the wire grid from the ceiling using your chains and s-hooks.
Step 2: At your work table, cut the silver wire into 2" pieces (your quantity depends on the number of glass balls you are using). Loop each 2" piece once around a nail to create the toggle. You can use pliers to adjust the size of the loop, particularly to make it small enough to fit inside the top of the glass bubble.
Step 3: Cut a piece of fishing line a few feet long. Knot one end to the silver toggle you just made. Slip the toggle inside the top of the glass CB2 ball. Then attach the other end of the fishing line to the wire grid. Hang each glass ball at varying lengths. We started from the center of the grid and worked our way out.
Step 4: In the very center of the grid we added our 2 light sockets. We wired both sockets close to the top of the grid and plugged in both cords to the ceiling fixture (or you can easily have an electrician wire the cords to a single ceiling outlet). Plug in your Half Mirror Light Bulbs.
Step 5: We added silver ball ornaments to the chandelier. We hung these balls extremely close together near the top of the grid so as to completely conceal it (the grid shouldn't show when you're done). For some of the balls we created toggles using our silver wire, and for some we simply used Christmas ornament hooks! Make sure that for each ball you hang directly on the grid that you twist the wire together so the hooks will not fall off if the chandelier is ever shaken (we live in California, so it's a factor we need to consider!).
Step 6 (optional): We ended up creating a cover around the top of the chandelier so as to conceal the chains holding it up as well as the sides of the wire grid. We simply created a light-weight crate that could be hooked to the chains holding up the rest of the chandelier. It was painted a pale pink to match the color of the walls in our store. Another option is to create a framework around the chandelier and cover it in a semi-sheer fabric so as to let the light shine through, much like a lamp shade. If you hook the chandelier close enough to the ceiling, you don't need any cover...we simply have high ceilings in our store and wanted something to finish the look of the piece.
We hope these steps help you put together your own Bubble Chandelier. We had a lot of fun creating it, and it really makes a fun project for two. We would love to build another piece, with the next chandelier on a circular grid. If we end up making a few smaller chandeliers for our fitting rooms we will be sure to let you know! If you end up making a chandelier based on our DIY, let us know!
To see more of Faire Frou Frou and our recent remodel, click here.
 it's raining bubbles
* * * * * * * * * * * * *
Make sure to follow us on Facebook, Twitter, Bloglovin' or Google Friend Connect
Shop with us at Faire Frou Frou


103 fabulous comments:
hooray! i've been waiting for y'all to share your secrets on that. it's gorgeous.
Dear Alison and Gail,
You guys are amazing, enterprising and very generous.
I will be sure to make the time to visit next trip to the left coast.
xxoo - Petra
This is positively fabulous and looks perfect in your store! I am so impressed by this DIY :)
Super Duper Fabulous!!! The look of it is so beautiful!
I suck at DIY. I would really try for this though! I would love to have this in my dressing room!
Fabulous!
♥
Wow ladies, this and the final result are amazing! You are both so multi-talented and inspiring!
xo
that looks fantastic, you would have to have patience to make it though, great!
that's fantastic, no doubt requiring a lot of patience, great.
WOAH!! I can not believe you did that all yourself- it is just STUNNING. It is like a work of art that looks like it cost thousands. I LOVE this idea- what an awesome idea!
This looks fabulous! Thanks for sharing DIY instructions. Have a wonderful day!
It looks absolutely GORGEOUS!
Loving the silver ones before the clear...every detail counts.
Have a wonderful week!!!
How incredibly beautiful. Very sexy!
Incredible!!!!!!!!!!!!!!!!!!!!!!!!!! I still find it hard to believe it's a DIY project...
WOW, that's pretty UNIQUE!
I am COMPLETELY impressed!! that looks amazing!!
Brilliant! Great page: Found you on made by girl.... :)
Wow! I just read your comment on my Brocade post and came right over!This is amazing truly amazing. I used the cb2 bubbles for a wedding I did. I hung them at different lenghts going around a pergola that housed the cake and we had soft pink votive in the bubbles. It was so stunning at night time. You went over the top. You have a lot of patience but the outcome was worth you hard work it is wonderful. Oh and by the way,Brocade did disappear. I went on a search for them because I love the look and wanted to do a post and they sent me there new catalog and I get emails, they also have a blog. Thank you for inviting me over here. Love bubbles, Kathysue
oh la la, it's adorable!! This is a great idea for Christmas decor since it looks so Holiday!..It's Christmas at Faire Frou Frou every day!Beautiful!..
LOVE IT!
I LOVE this idea - and am so impressed you documented it, shared it and are telling us how to do it on our own. It's so chic!
perfect!! works so well in the shop!
ohhh my goodness. this is absolutely fantastic! thanks for sharing this...adding this to my list for my future dream room:)
that is fab !! I will have to lnk back - so nice of you to share the how to - best le
This is fantastic.
I saw something similar while in Florence, Italy, but not has beautiful.
Congradulations on your continued creativity.
Bravo!
LOVE! Thanks for the comment on my blog too :-)
I have to tell you, i purchased a similar bubble chandelier for a client, will post pics when it's done. Yours is by far so awesome and creative, love it!
So gorgeous! I wish I had your talent!!!
WOW - this is incredible - you did a fantastic job! Thanks for sharing all your clever tips. I'm really so impressed!
xo
Thank you for this great tutorial. The finished product is really fabulous, so creative! I would love to visit your glamarous boutique and see it in person!
Wishing you a good week,
Mimi
CUTE. They're like at housand bubbles in the air. :)
I love this post!!!
I absolutely love your chandelier!!! It's an amazing job! And the result is soooooo beautiful! It's such a great and original idea! Congratulations for your lovely bubble chandelier!
Rosa
http://www.chic-deco.com
You ladies are BRILLIANT!
I'm totally going to do this in my crumb's room in our new place (whenver that might be!). Almost tempted to do a smaller version inside her teepee!
This is totally happening in my new home dwellings once I figure them out!
Amazing ladies! When I have this kind of space some day, I'm definitely trying it!
That looks amazing!! What a clever idea!
♥ Daniëlle
Ainns, me encanta la idea...fantástico DIY!!
Gracias por pasar a visitarme, encantada de conocerte!! Bsss
Such a great project! Thank you for stopping by my blog!
You have a beautiful blog. I cant wait to explore more of it!
Hope to see you soon:)
Greetings
That is flipping brilliant!!
oh wow, I so wanna give this a shot
OMG that is brilliant! You guys so rock :) xoxo
Hi sweet ladies, I'm new here and gasping at the jaw dropping beauty of this fashionable DIY project! Well done! I am now following you and looking forward to another visit!Have a Stylish day.Sharon xx
LOVE your blog!!
xxx
It looks absolutely amazing, you guys aren't just pretty faces in super fab lingerie :D
Awesome job.
*kisses* HH
It is raining bubbles!!! Bubbles are so so special and magical to me... Your shop looks STUNNING, SO AMAZING, delicate and whimsical AND still Sexy!!
Beautiful job!!
XO
wow!!
this is an AWESOME diy :)
thanks for the tips missy!
xoxo
I'm glad I stopped by. I now know how to make bubble chandelier. They are very pretty indeed. Thanks for the inspiration. I think I would prefer if you guys made some for me. Am terrible at such things even with a guided tour as this. Lovely and inspirational post, darling!;-)
well, what a marvelous blog! Clearly I need to put some more thought into my skivvies. wow! some of these images are incredible. thanks for visiting osh!
how amazing!!!! I mean, really super amazing! Love it, adore it and totally heart it!
xx trina
Great do it ur self!
Thanks for stopping by the blog.
L.
omg. I am so frggin in. LOVE IT!!!
Beautiful!!! Wish I could see it in person.
That's amazing! It looks so beautiful, fun and elegant at the same time!
Lila Ferraro
Queen Bedroom Sets
They are so cute! I want them so bad right now!
What a wonderful Bubble Chandelier, that is just gorgeous and many thanks for sharing the tutorial.
Your shop looks so pretty.
I hope that you are enjoying the rest of the week.
Hugs
Carolyn
This is a great DIY! I am transferring to a new house, and I would love to do this on our living room! Thank you for sharing this! No I can make my own bubble chandelier :)
WOW so cool and beautiful.
Love...love...love the bubble chandelier project!! May try it myself:) You have done a wonderful job on your store-- looks amazing!!
oh my lord, it is insanely beautiful!!
Gorgeous!
The patience paid off... this is a true work of art.
This is one of the most amazing and helpful diy projects I have ever seen!!! How amazing!!!!
Ahhhh! I'm so excited you shared this. I fell in love when I saw it on the blog with your shop enveiling and was going to try to figure a way to make a mini version for my bathroom. It won't happen for a month or so, but I'll be sure and send photos of my attempt! It's so lovely!
Sallie Ann
Finally this is my first time I pop in here. I discovered a lot of remarkable substance on your webpage specially its conversation. Keep up the good work! I invite you to see my post, I hope you will find interesting too.
Your bubble chandelier is stunning! Thanks so much for passing along a tutorial!
Please see my blog for a mention and a link XX Gypsy Purple
This is such a great idea! It does look like a lot of work, but still looks liek funt o make too, and the end result is definately worth all the potential trouble. I would love to have one such thing at home, but the space in my room doesn't allow for such a grand chandlier just yet. Definately gettign something like that once I have a bigger space and all my own :)
Wow, that looks amazing!!!!!
I love this! The finished product looks amazing. I want one over my bathtub, please.
very simple line but very creative, looks comfortable, something talented going on here
Love it! Time consuming I am sure, but the finished look is amazing! Thank you for sharing.
Frou Frou! Fabulous beyond, as is your site!!
I have a surprise up on mine! Visit soon!
Karena
Art by Karena
Girls you are so talented what a fabulous creation I love it!
so creative!
Oh my, I just died of cuteness. Thank you for sharing this just made my morning!
xoxo.kissmekoko.
I absolutely love your chandelier, the way you describe the method of making bubble chandelier.
Thanks for such nice information.
Gorgeous! Could you please explain how you incorporated the lights into the fixture? I'm terrible at DIY and can't visualize what the lights look like in their "raw" state, before you hung them within the chandelier. Thank you!!
@Jenny Weddel - Thank you for your comment! We actually had a light fixture in our ceiling from when we had a regular chandelier hanging on the ceiling. We had our electrician change the ceiling outlet so that we could simply plug in the 2 light fixtures from Urban Outfitters. Essentially we just plugged in the electric cord into the ceiling. The other end of the lightbulb outlet we just poked through the wire grid. We used wire to tie the lightbulb fixture to the grid.
Does that help? You can always call us at our shop to discuss!
xox
I love this chandelier. I was trying to figure out a way to incorporate some femininity in my little dressing area. I think I found it. I absolutely suck at DIY. Can you give me a rough estimate of what a custom smaller version of the bubble chandelier would cost?
Hey, FFF -
I wanted to let you know that I'm TOTALLY DOING THIS OMG. (Pantpant) Thanks for the inspiration :)
I've posted it on my own blog and stolen your picture (giving proper credit, of course): http://www.400sqft.com/2011/02/this-just-in-bubble-chandelier-on-its.html
Thank you so much for the DIY; I'm looking forward to this project like no tomorrow!
I'm in LOVE! I just need to decide if I'm going to do it in my kitchen or living room! Thanks soooo much for the great DIY, I'll be linking as well.
I'm in loooove! :D
Inspired by yours and ReadyMade's bubble chandeliers, I made one of my own!
http://www.mintlovesocialclub.com/2011/03/bubble-chandelier.html
Your store is so lovely!
Beautiful!
But I have a question: how do you clean it??
WOW! This is absolutely amazing! I wish I had a place to make something like this for. If I did, I would be all over it. Thanks for sharing!
Definitely love your Diy!!! I'd like to make one for my new house...but I was wondering what the "box" covering the grid in the upper part is made of. Could you help me, please? Thank you!!!
Definitely love your Diy!!! I'd like to make one for my new house...but I was wondering what the "box" covering the grid in the upper part is made of. Could you help me, please? Thank you!!!
Noeyalin - Thanks for your comment! The upper half of our chandelier was made with a very light-weight wood. We just bought something lightweight at Home Depot, cut it to fit the dimensions around the wire grid and nailed it together with a wooden framework. If given the chance to make this again, we would like to do a wooden framework and instead use fabric (like silk) to cover the top.
i made your diy for my kitchen and a small one for my bedroom..i made the one in my bedroom with very small bubbles and crystal long things that came off old chandliers that i found in an antique stores over the years i used them on the xmas tree..but they are beautiful on my chandlier now..everyone loves my chandliers..and i wish i knew the name of the crystal long things..i just moved into a cottage and it was the first thing i wanted to do..i am 70 yrs old and climbed up and down the ladder till the chandliers were perfect..i wish i could send you a picture but i am not computer smart...thanks for your idea...now people want me to make them one...
thanks for your answer and...for the brilliant idea...I'm collecting the last elements: in a few days I'm going to begin to make the chandelier...wish me good luck ;-)
This is a seriously amazing DIY! So genius and so gorgeous!
That is beautiful! Solid colored or clear glass ornaments are perfect for all sorts of ideas! All year long! Thanks for sharing!
Spotted on Pinterest. Thanks for sharing this fab tutorial
Stunning!! love anything to do with bubble's so relaxing. anyways I found someone that custom make bubble chandelier or bubble strands of different size and lengths of Bubble Chandelier and bocci style lighting.
OK, so guess what project my wife wants to do for our new place after we get everything unpacked : )
Thanks for posting this. You have no idea of what you've started. Then again, after all the comments, maybe you should think of marketing more than underfashions?
Wow, that is classy. Nice bubble chandelier. Really awesome. Can't say anything but those beautiful words.
It's absolutely beautiful, but really... how do you keep it clean and dust free without tangling the bubbles and fishing line?
Thank you for sharing! I think this is a great DIY project!
First project I've attempted from pinterest and the directions were perfect. Go big or go home right? Thanks for the idea and directions! !
I'm going to be making this, slightly differently for my wedding. I'll send you pictures if you like when it is completed. (Still 7 months away)
Nice blog! I got beautiful information regarding interior crystal chandeliers.
What a wonderful idea! It shows incredible patience and skill.
Wow I'm speechless! This is beautiful!
This is so lovely! I've been wanting to do something like this for a long time! Thanks for the push! You did a great job!
Post a Comment